Upon beginning to add visualization of the grains to the waveform, I quickly realized there was nowhere near the amount of grains there should be. I looked at the code for ages before I realized, the buffer won’t make more than one grain per buffer.
It took quite some time to fix this, as I attempted many solutions to remedy this issue. I tried working on smaller parts of the buffer at a time, but this lead to clicking and artifacts that were far too irritating to leave in.
I then decided to loop through every sample, and generate a grain when a specific amount of samples has passed. This worked, however it meant that now all grains that were just generated would start at the same time. Not only did this make the onset of all those grains quite loud, it also meant that the audio would be different depending on the chosen buffer size.
This is a big no no. I did not know how to fix this until my supervisor pointed out a bigger issue: Regardless of how fast grains are generated, all grains created will start exactly when a new buffer starts. This meant that the timings were actually always off. Sure, the buffer is only ~20ms long, but if the grains are 10-200ms long, this will have quite the effect.
The fix for this actually ended up being the fix for grain generation as well. I introduced a new variable called “grainOffsetInSamples” - this essentially meant that a grain would wait a specific amount of samples to play.
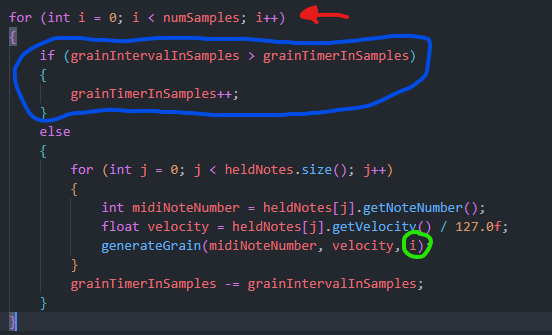
The implementation for this was actually quite simple once I realized the solution. The red arrow shows a loop that goes through every single sample. I use this as timekeeping shown in the blue circle, if the timer is less than the interval, it will increment. Once it has overtaken the interval, it will generate a new grain using “i” as the offset, which represents the amount of samples. The timer then resets.
This solution completely fixed both issues and grains now generate and play at the correct times.
This meant it was time to refactor all the code. I wanted to be able to work in modules and easily expand the project to perhaps allow the user to control multiple files or multiple GranularEngines per file.
The code was not very modular, and almost all of the data passed through “AudioProcessor” in order to reach a destination. This was a terrible solution and introduced an unnecessary step in the flow. Instead, I create the GranularEngines in the AudioProcessor, and pass this as a pointer through to everything that needs to affect it.
I also pulled the LoadingComponent out of the MainGUI and instead made the PluginEditor the “home” for both the MainGUI and the LoadingComponent as these really had no business being intertwined, and were not dependent on each other.
This makes the code a lot cleaner, and removes a lot of steps from how things function. Frankly this was overdo, but will make expansion a lot easier. A class diagram displaying how Reconstruct now operates can be seen below:
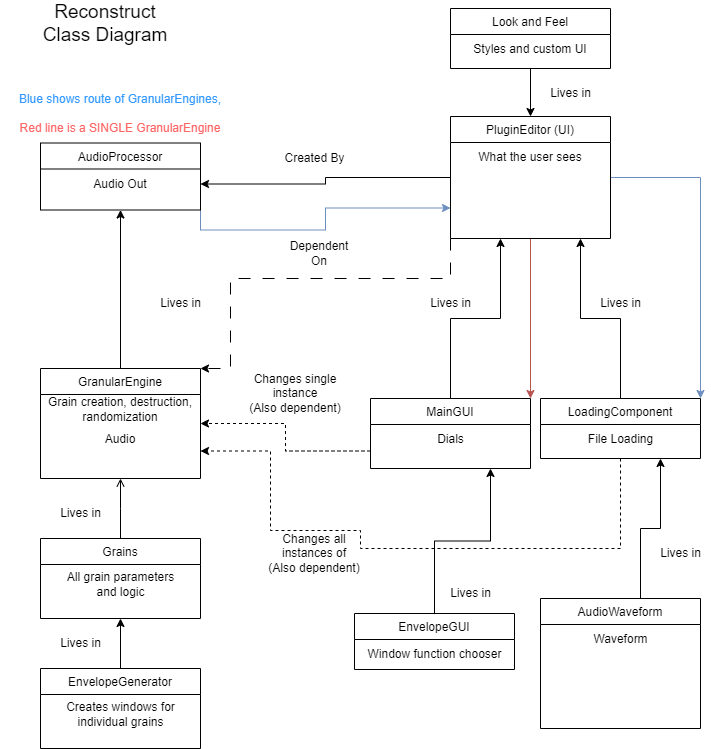
I considered making a class diagram for how Reconstruct operated before, but honestly it was such a mess that I didn’t even want to look at it, and it would have taken way too long to draw all those arrows.
This brings me back to adding grains to the waveform. Currently, this works well for longer grains. However, if a grain is very short (say 10ms), the timer in the LoadingComponent simply does not update fast enough to display this on the waveform. So this is something I need to fix in the near future.
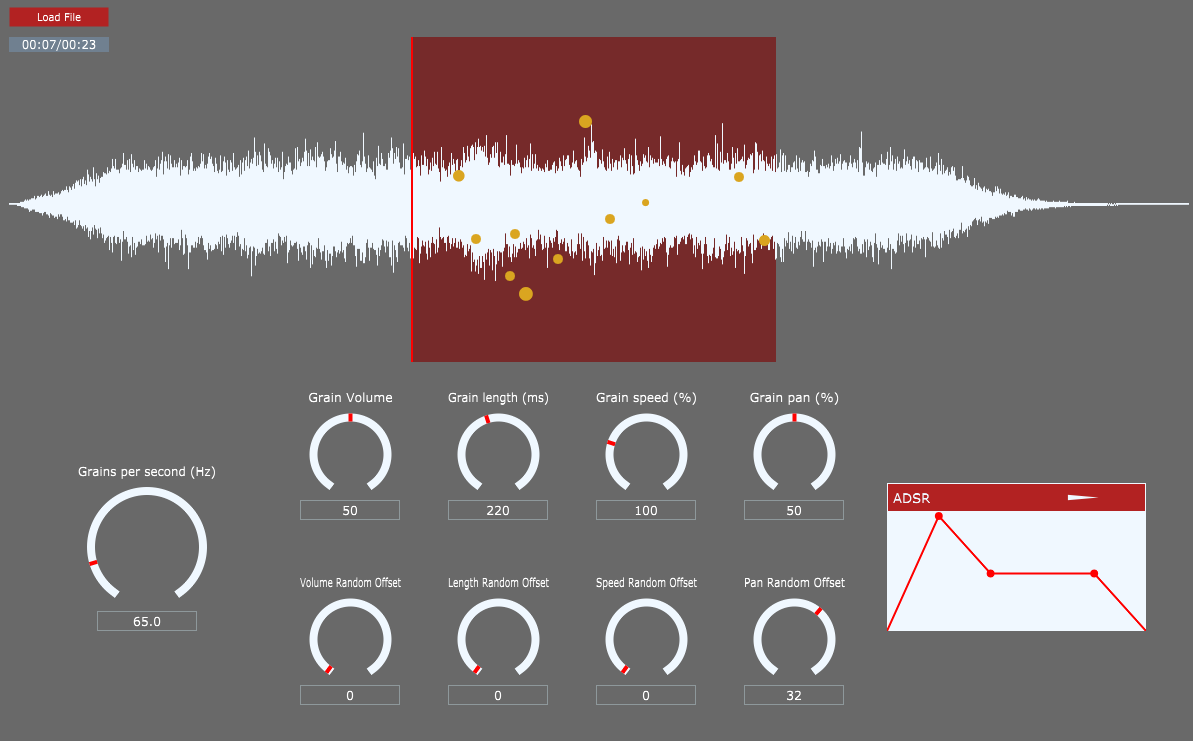
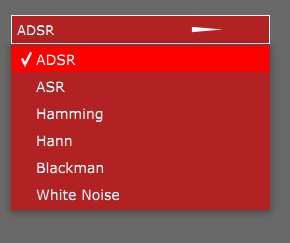
I also updated the graphics for the windowing chooser and the button. The current visual state of Reconstruct is this:
With a bit of effort, and a lot of luck, Reconstruct Video Demo 2 will be ready for Friday.
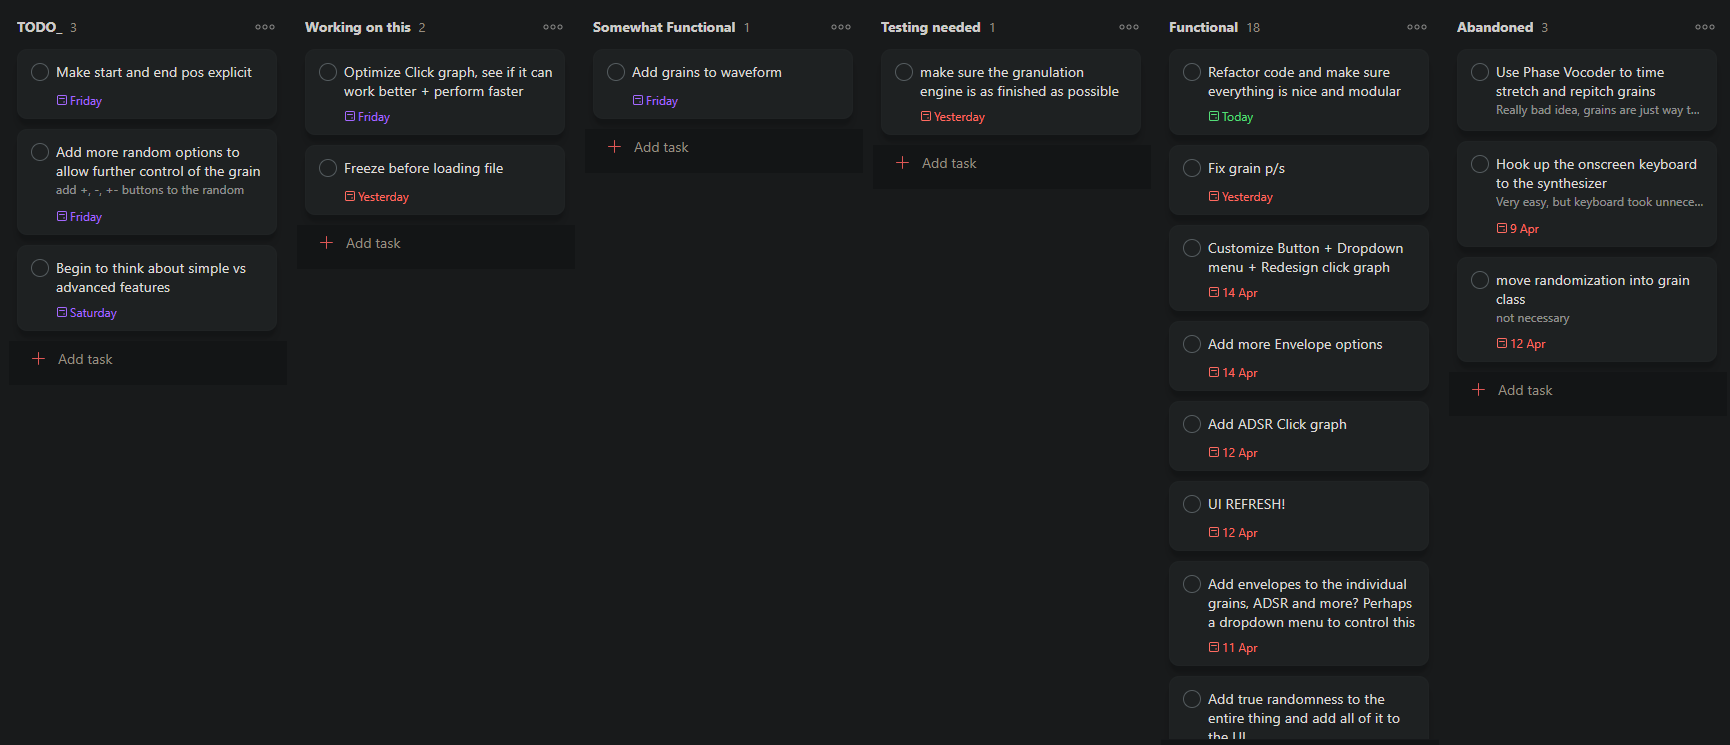
The update to the board is not on schedule, as some of these issues did make me lose some motivation and also put a bit of a spanner in the works, but here is the board as of now: